Text Center & Scroll > 2D
Contents
Text Center & Scroll Up & Scroll Left/Right
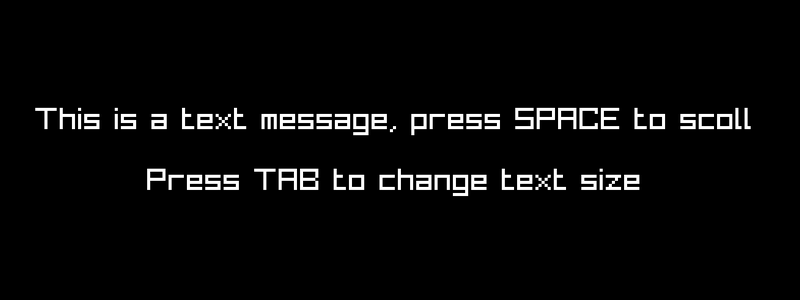
Demonstrates centering of text at different sizes, moving of two different texts left and right across screen as well as up. View on Github
Before you start
I am a self taught Go programmer and do it as a hobby, the code below is my own interpretation of how to do something, probably not the only way or the best way. This is intended as a resource to learn some basic Raylib and Go game dev skills. If you want to use any of the code anywhere else, feel free to do so.
Code
package main

import (
	rl "github.com/gen2brain/raylib-go/raylib"
)

/* MORE RAYLIB GO EXAMPLES ARE AVAILABLE HERE:

https://github.com/unklnik/raylib-go-more-examples

*/

var (
	cntr                     rl.Vector2                    // SCREEN CENTER
	txtsizes                 = []int32{10, 20, 30, 40, 50} // FONT SIZES SLICE INT32
	currentSize              = 2                           // SET CURRENT SIZE
	txtMoveState             int                           // STATE OF MOTION
	txtx, txty, txt2x, txt2y int32                         // X & Y POSITIONS OF TEXT
	txt, txt2                string                        // TXT STRINGS
)

func main() {

	rl.InitWindow(0, 0, "text center & scroll - raylib go - https://github.com/unklnik/raylib-go-more-examples")
	scrW, scrH := rl.GetScreenWidth(), rl.GetScreenHeight() // GET SCREEN SIZES
	rl.SetWindowSize(scrW, scrH)                            // SET WINDOW SIZE

	//rl.ToggleFullscreen() // UNCOMMENT IF YOU HAVE DISPLAY ISSUES WITH OVERLAPPING WINDOW BARS

	cntr = rl.NewVector2(float32(scrW/2), float32(scrH/2)) // SET SCREEN CENTER

	makeTXT() // SEE FUNCTION END OF CODE

	camera := rl.Camera2D{} // DEFINES THE CAMERA
	camera.Zoom = 1.0       //SETS CAMERA ZOOM

	rl.SetTargetFPS(60) // NUMBER OF FRAMES DRAWN IN A SECOND

	for !rl.WindowShouldClose() {

		if rl.IsKeyPressed(rl.KeyTab) { // CHANGES TEXT SIZE
			currentSize++
			if currentSize == len(txtsizes) { // REACH END OF SLICE RETURN TO ZERO
				currentSize = 0
			}
			makeTXT()
		}

		if rl.IsKeyPressed(rl.KeySpace) { // CHANGE MOVE STATE
			txtMoveState++
			if txtMoveState > 2 { // REACH END OF MOVE STATES RETURN TO ZERO
				txtMoveState = 0
				makeTXT()
			}
		}

		switch txtMoveState {
		case 2: //UP
			txty -= 4 // -Y VALUE MOVES UP

			// Y LESS THAN ZERO (TOP OF SCREEN) RETURN TO BOTTOM (SCREEN HEIGHT)
			if txty < 0 {
				txty = int32(scrH)
			}
			txt2y -= 4
			if txt2y < 0 {
				txt2y = int32(scrH)
			}
		case 1: // RIGHT LEFT
			txtx += 4                                            // MOVE TOP TEXT RIGHT
			txtlen := rl.MeasureText(txt, txtsizes[currentSize]) // MEASURES LENGTH OF TEXT

			// X LARGER THAN SCREEN WIDTH RETURN TO ZERO - TEXT LENGTH
			if txtx > int32(scrW) {
				txtx = -txtlen
			}
			txt2x -= 4 // MOVE BOTTOM TEXT LEFT
			txtlen = rl.MeasureText(txt2, txtsizes[currentSize])
			if txt2x+txtlen < 0 { // X SMALLER THAN ZERO MOVE TO SCREEN WIDTH + TEXT LENGTH
				txt2x = int32(scrW) + txtlen
			}
		}

		rl.BeginDrawing()

		rl.ClearBackground(rl.Black)

		rl.BeginMode2D(camera)

		rl.DrawText(txt, txtx, txty, txtsizes[currentSize], rl.White)    // DRAW TOP TEXT
		rl.DrawText(txt2, txt2x, txt2y, txtsizes[currentSize], rl.White) // DRAW BOTTOM TEXT

		rl.EndMode2D()

		rl.EndDrawing()
	}

	rl.CloseWindow()
}
func makeTXT() {

	txt = "This is a text message, press SPACE to scoll"

	txtlen := rl.MeasureText(txt, txtsizes[currentSize]) // MEASURES LENGTH OF TEXT
	txtx = int32(cntr.X) - txtlen/2                      // X = CENTER - HALF TEXT LENGTH > CENTERS TEXT
	txty = int32(cntr.Y) - txtsizes[currentSize]         // Y = CENTER - TEXT SIZE

	txt2 = "Press TAB to change text size"
	txtlen = rl.MeasureText(txt2, txtsizes[currentSize]) // MEASURES LENGTH OF TEXT
	txt2x = int32(cntr.X) - txtlen/2
	txt2y = int32(cntr.Y) + txtsizes[currentSize]

}
Video
Want to give it a Go?
To start making games with Go and Raylib you will need:
- Go - https://go.dev/
- TDM-GCC - https://jmeubank.github.io/tdm-gcc/
- Git - https://git-scm.com/downloads
- Go Bindings for Raylib - https://github.com/gen2brain/raylib-go
- Visual Studio Code - https://code.visualstudio.com/
You can, of course, use other code editors however VS Code is my own personal preference